Category Archives: Kiddo Cooks

Guest Post :: Quick Cookin' with Shutterbean Mexican Stir Fry

Oooh lalala! Ring the dinner bell friends, it’s time for Quick Cookin with Tracy of Shutterbean. Tracy is not only an amazing cook, she is a very clever cook! Her meals are not only supremely tasty they are always deliciously simple—perfect for busy folks, whether you have kiddos or not. Hit it, Tracy!

Hi friends! Tracy here with another easy peasy dish for you and your family to enjoy.

Have you heard of Soyrizo? It’s soy version of chorizo and it’s totally fabulous! It’s got the taste & texture of spicy chorizo, but there’s no meat involved! My husband is a huge fan of the stuff even though he’s a big meat eater. Sometimes I serve it alongside our eggs and toast or I mix it up with breakfast potatoes! Most of the time I just use it to make this quick Mexican Stir Fry. My boys love it.

I’m always trying to find a way to get my son Cooper to eat vegetables, and this dish does a good job of masking some! In this rendition, there’s corn, tomatoes and green peppers. There’s also a dose of protein & fiber from beans & brown rice. The soyrizo has all the spices you need so nothing really needs to be added, making it super easy to make. The leftovers are fantastic. Throw some in a cheesy quesadilla or add it to a burrito or taco! I like to eat what’s leftover the next day with some avocado chunks and a few dashes of hot sauce on top!

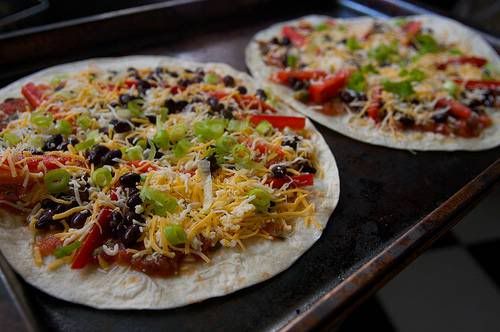
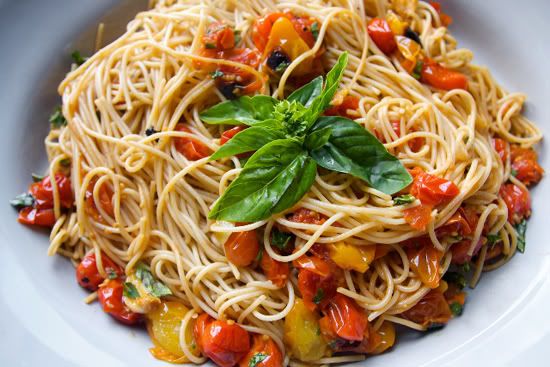
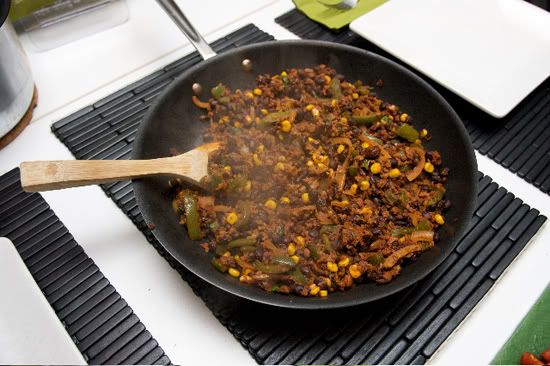
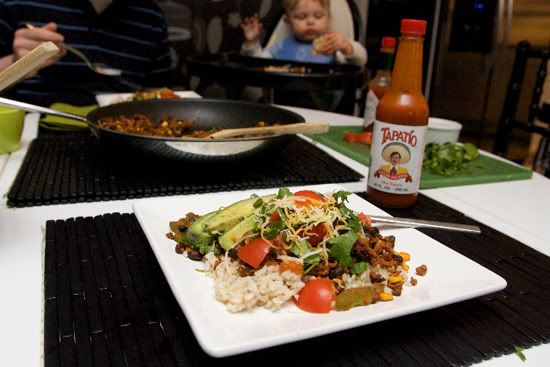
This is what it looks like fresh off the stove:

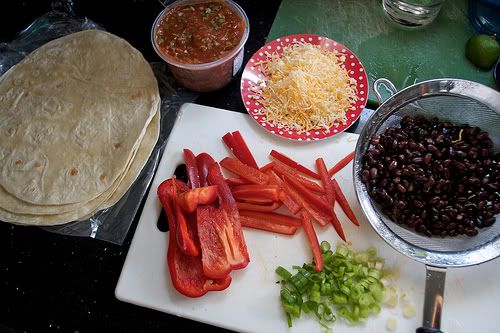
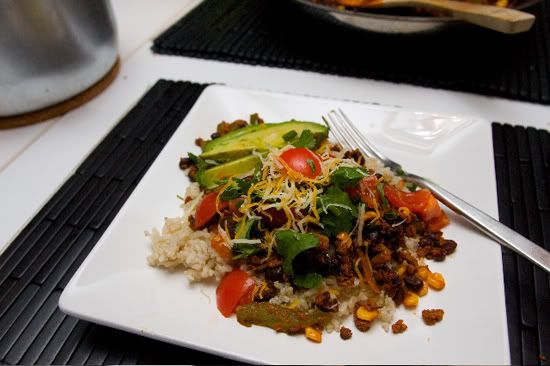
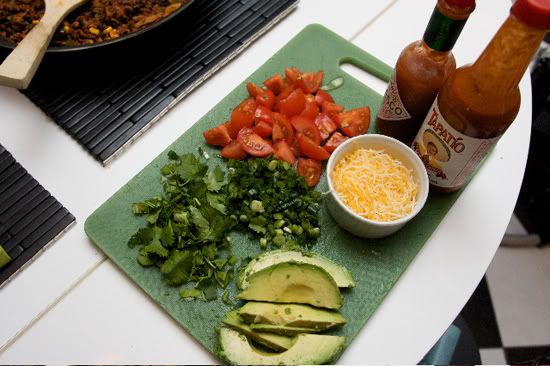
I like to make a little “toppings” bar so you we all can customize our own plate!

My boyz LOVE it.

p.s—This is what soyrizo looks like! I usually get mine from Trader Joe’s!

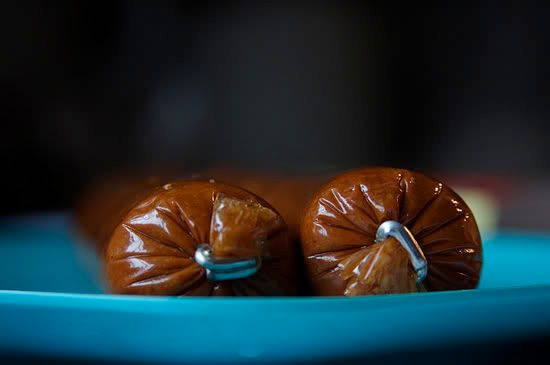
p.p.s.— It looks like a long sausage- shaped like a big U. You need to make sure you don’t cook the “skin” as it’s plastic! Just cut off the ends and *squeeze* it out into the skillet.

Mexican Stir Fry
Ingredients:
-1 package soyrizo
-1 medium onion, chopped
-1 15 oz. can black beans, rinsed
-1 cup frozen corn
-2 bell peppers, chopped (use any color you like)
-2 cups cooked brown rice

In a deep skillet on medium high heat, add soyrizo & onions. Cook for a few minutes until the onions start becoming translucent. Add in the frozen corn & bell peppers and cook for another 3-5 minutes. Add your black beans and brown rice and heat through. It’s really good if you can almost brown/char some of the soyrizo! It adds a nice texture to it! Serve with you favorite toppings!

Fun Toppings:
-avocado slices
-sour cream
-chopped tomatoes
-cilantro
-shredded cheese
-green onions
-tortilla chips
-salsa
-hot sauce!

This recipe is just a base. If you like more corn, add more corn! Not a fan of black beans? Add pinto! Have some leftover sweet potatoes? Throw them in! I must warn you that the soyrizo is on the spicier side. If your children or significant other is sensitive to spice, then you might wanna opt out of this recipe 😉 You could also just add some pureed sweet potatoes to help balance the spice! Fortunately, my son Cooper LOOOVES spicy stuff. He goes totally apey when I make this. He calls it “Spicy Rice!” I guess the apple doesn’t fall from the tree!

————————————–
Thank you so much Tracy for another super yum yum dish. I can vouch for the fact that soyrizo is TASTE-TEE!!! Oh, and that little cutie in the background (aka The Spicy Wonder!) is Tracy’s mega cute boy Cooper. Coop has been Weekly Kiddo before and I think you’ll agree he is adorable. Check him out here.

Guest Post: Quick Cookin' Applesauce with Shutterbean


Hi Kiddos! It’s Tracy from Shutterbean here with another yummy-and-easy recipe for you. Apple season is coming up….and you know what that means??!!  Homemade applesauce!


I have warm fuzzy thoughts when I think of my mom’s homemade applesauce. My grandmother had several apple trees in her backyard that we would collect from and my mom would turn our loot into fresh applesauce. We would eat bowls of warm cinnamony applesauce and think it was pure alchemy!  Perhaps your children will think you’re a super hero too if you make some. I swear, you’ll never look at jarred applesauce the same way… Let’s get started!

Start out with a big bowl of apples. There’s about 12 in here. A mixture of varieties is kind of fun, but unnecessary.


Chop up your apples, removing the cores and throw them in a large pot.


Over medium heat, add some water OR unfiltered apple juice to the pot.  In the end, there should be about 2 1/2 cups of liquid added to your apples.  If you aren’t adding juice, this would be a perfect time to add a sweetening agent. Brown sugar, maple syrup or agave syrup will do the trick. Remember to go light and then add a little more if you feel it needs more sweetness.


Let the apples stew, until they break down. Stir every now and then and keep adding juice or water when the sauce seems too thick. Be careful not to burn the apples!


Add a tablespoon of cinnamon to the mix!  Too much cinnamon for your taste? Go easy on it! Wanna jazz it up even more? Add some chopped candied ginger to the apples when they’re stewing!  It makes it nice and spicy!


Don’t feel like taking out all the skins? Puree it! Think of all the fiber!


After all the apples have cooked down, stick an immersion blender in and puree it!

It makes the mixture smooth and delicious!  You’ll find that the skins help thicken up the sauce.


And now you have homemade apple sauce! Let cool and store in the fridge!

The process takes about 40 minutes and your house is going to smell AH-MAZING!!

Now that you have all this apple sauce what can you do with it? Well of course it’s super nom-worthy for the kiddos, but grownups can enjoy a tasty apple sauce too. Put some in your pancake batter!  Add a little to a brownie recipe!  Mix in a little with your yogurt and granola! Put some in your banana bread! But honestly…it’s heaven on its own.

Thanks for stopping by!! I’ll be back again soon more quick-n-easy recipes.

Quick Cookin' With Shutterbean: Mexican Pizza

Hey everyone! Today we have another special post from our favorite food expert—Tracy from Shutterbean! The thing I love best about her recipes (besides the totally nom-worthy photos that have me salivating at my computer….) are how quick-n-easy they are. Perfect for busy families or just people on the go-go! Tracy is a regular over here at Modern Kiddo and we are always thrilled when she stops by. In fact, we’re so thrilled that we gave her her own fancy Pilgrim-approved logo! (So adorable Pilgrim!) OK Tracy, let’s get this show on the road! xoxo Alix

Hi everyone, it’s Tracy here. So here’s a little recipe that’s now a staple in my arsenal of family-friendly foods: Southwestern Pizzas!

It makes the boys in my life SUPER happy when I bring these to the table. This dish includes all the yummy things that my little guy Cooper loves— red peppers, black beans, cheese and tortillas! But I gotta say it also tastes super great with loads of hot sauce, cilantro and sour cream on top. The best part is that it comes together in NO time!! The recipe is also pretty adaptable. Take away stuff you don’t like—add stuff you do! What’s involved? Take a look!

Take a tortilla and spread your favorite salsa on top.

Top with sliced red peppers & beans!

Finish with shredded cheese & green onions. Pop them on a cookie sheet and put them in the oven!

Cut them up with a pizza cutter and dig in!!!

Say Adiós!!! Cuz they’ll be gone in no time!!!

Southwestern Pizzas (recipe adapted from Family Circle Magazine)

1 red bell pepper, thinly sliced
4 flour tortillas (whole wheat works well too)
1 15 oz.can black beans, drained & rinsed
2 cups shredded cheese (or more if you love cheese!)
2 green onions, finely chopped
1 cup favorite salsa
cilantro (optional topping)
4 tablespoons sour cream (optional topping)

1. Preheat oven to 400 degrees. Take a tortilla and spread a few spoonfuls of salsa on top. Top tortilla with peppers, black beans and finish with the shredded cheese& green onions. Repeat process with the remaining tortillas.

2. Put pizzas on a cookie sheet (2 per sheet) and bake for 12-15 minutes until browned and crispy. Top each pizza with cilantro and a tablespoon of sour cream and chow down!

***I baked 2 pizzas at a time because I didn’t feel like cleaning two cookie sheets! ***

Thanks for stopping by! Don’t forget to swing by Shutterbean for more yummy recipes. I’ll be back again soon with more Quick Cookin’!

Kiddo Quickies: Easy Peasy Meals with Shutterbean

There are a lot of food blogs out there and I get soooo sucked in to the delicious eye candy they are serving up. Yet I have to admit I rarely make the dishes because as amazing as they are, they often seem a bit daunting and look like they take twice as much time as I usually have. One of my totally top fave foodies is the delightful Tracy from Shutterbean. She always has the best combination of yummy food, gorgeous photos AND things that can be whipped together in minutes. I can honestly that that EVERY SINGLE THING I’ve made of hers has turned out AHHHH-mazing. So I’m kinda bustin’ to tell you that she’s going to do a semi-regular little feature over here. Quickie’s with Shutterbean! Fast, tasty food for parent’s on the go! (and heck, if you’re not a parent you’ll still love ’em!) I mean take a look at this tastiness:


Take it away Tracy!

Hi everyone! It’s Tracy from Shutterbean here. Are you super busy with the kiddies and have no time to cook? Do you NOT feeling like cooking because it’s totally crazy hot right now?? Whoa! Me too! Thank god I’m not the only one. Here’s a little recipe for all you busy mamas out there! Quick Tomato Basil Pasta. It’s super duper simple and it’s one of my go-to summer meals because the reward for such little effort is GREAT. Just wait until you taste how sweet the tomatoes get when you roast them up!  It’s the easiest way to make a tomato sauce. No more slaving over the stove. Tomatoes are at their best this time of year so go for it!

Let’s get started!

Take about a 1lb. of mixed tomatoes, coat them with a little olive oil and 2 cloves roughly chopped garlic. Season with salt & pepper!

Roast in an oven at 400 degrees until the tomatoes start to burst open and brown. Should take about 15-20 minutes.

In the meantime, boil pasta & reserve some of the pasta water! Toss the tomatoes directly into the strained pasta!

Add a bit of the reserved pasta water & freshly chopped basil into the pot. Stir stir stir!

Now it’s time to plate your pasta in a pretty dish. Add a few glugs of olive oil on top and smother it with some fresh Parmesan cheese. Top with a pretty basil leaf!

You’ll have this big plate o’ pasta in less than a half hour! Promise.
Here’s what you’ll need:

-1 lb, spaghetti
-1 lb. fresh cherry tomatoes (the more the merrier!)
-2 cloves garlic, chopped
-salt & pepper to taste
-olive oil

If you like your pasta a bit spicy, red pepper flakes will do the trick! Sometimes I add a few splashes of balsamic vinegar with the tomatoes to make them extra tangy. It also brings out the sweetness. Try it & enjoy!

———————————————

YUM!!! A little kiddo tip: For those of you without AC, I would think about roastin’ a smaller batch of those tomaters in the toaster oven.

Thank you Tracy. Don’t forget to swing by Shutterbean for even more deeeelishus recipes. Like this Herb Butter, Goat Cheese Pasta or this amazing Summer Salad Showdown—mmmm!

Guest Blogger: Shutterbean and Bibs!

If you think I’m obsessed with the Peach’s wardrobe–well, that is nothing in comparison to how I feel about feeding her.   And I’m sure there are other moms out there too that have the same concerns.

Fortunately, we have one of our favorite food bloggers, the delightful Tracy a.k.a. Shutterbean here today as a guest blogger!

………………..

Hi! I am Tracy. I have a foodblog called Shutterbean and I’m momma to a very active 16 month old son named Cooper.  Food has ALWAYS been important to me, it makes me happy. Cooking and baking helps to keep me sane!  When it came to feeding our son, I knew I wanted to make my own healthy baby food from scratch.  I thought it would indoctrinate him into the foodie world.  I want him to enjoy food just as much as his parents.

So what’s that little gadget up there?  That’s the Beaba babyfood maker.  It’s this fun little gadget that steams your fruits, veggies, & meats AND purees them all in one!  It’s been a godsend and it’s made the whole making my own baby food endeavor a breeze.

I looked at the Beaba babyfood maker online during my pregnancy and thought it looked cool but it never ended up on my baby registry.  It seemed like a lot to ask of someone.  A few months later I received one at my baby shower!  I contemplated returning it as I already have at least 4 gadgets in the kitchen that I could use to make babyfood. Did I really need ANOTHER kitchen tool?

The bottom line is- If you are planning on making your own babyfood and want something that will help you do so with minimal cleanup, this modern gadget is for you!  Spend one night a week making all your food, freeze it in these little cubes. Tada!  You have delicious, wholesome meals for you baby.  You will have piece of mind knowing exactly what they are eating and revel in the fact that the sweet potatoes actually TASTE like sweet potatoes.

I am so thankful that my mom talked me into keeping it.

Some of our  favorite combos include:
  • peas with butter
  • cauliflower with onions and curry
  • carrots with butter
  • sweet potatoes with chicken and onions
  • green beans with chicken
  • pears and blueberries
  • apples with cinnamon
  • potato and leek puree wiht butter and cream
  • corn and butter

…………………..

You rule, Tracy! Thanks so much for spending some time here at Modern Kiddo. For more recipes, check out CHOW.com’s baby food recipes.  And Tracy recommends these great containers for freezing baby food too. Do stroll on over to Tracy’s highly addictive and very very yummy site, Shutterbean!

And of course you can’t feed a baby without a good baby bid! We found the following sassy bibs that you might like!

This Sourpuss X-Ray bib is perfect for the parents with a wry sense of humor.

I don’t know about you, but I went nine months without sushi, and let me tell you, this sushi bib from Kid Cosmic takes away a bit of the pain.

Of course Etsy is awash with delightful bibs for every baby, but I was particularly charmed by PearlyGrey’s wonderful bibs with the additional pocket to catch the overflow food.

I would have to give up my nickname of Dottie if I didn’t love this special little orange dotted number, which gets extra bonus points for being knit.  That hit the spot, Cutespot!

Of course this is just the tippy tip tip of good bibs.  Do you have a favorite?