Category Archives: Crafts + DIY

Help sewing mamas! How do you get your kiddo to actually WEAR the clothes you sew for them?

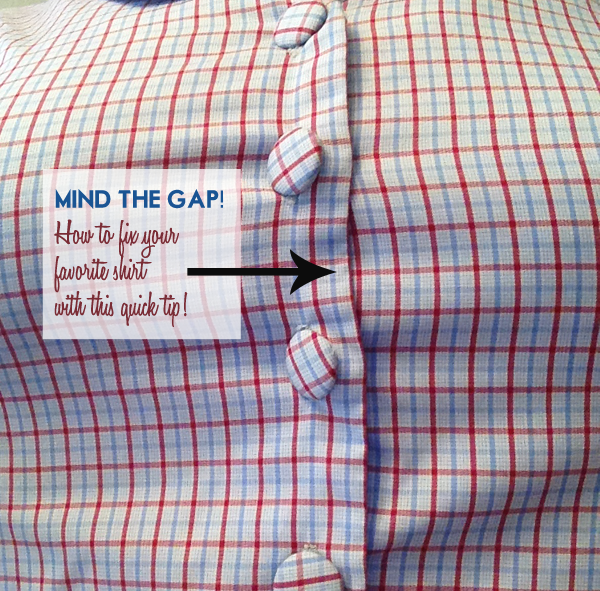
I love to sew.  There is something quite wonderful about sewing something for your daughter.  When I was pregnant, I hoarded vintage children’s patterns like a crazy person.  Oh, the darling cute vintage adorableness that I was going to swath my sweet child in! Quick and cute patterns that were a great training ground for trying out different sewing techniques that I would later try on myself.  Every year I would start out with a long list of projects for my girl.  But by the time I finished making these sweet little skirts, dresses etc, she would barely be able to fit in them. Sigh, that growing child thing can be such a bummer.

I did have a few bits of success.  A skirt here:
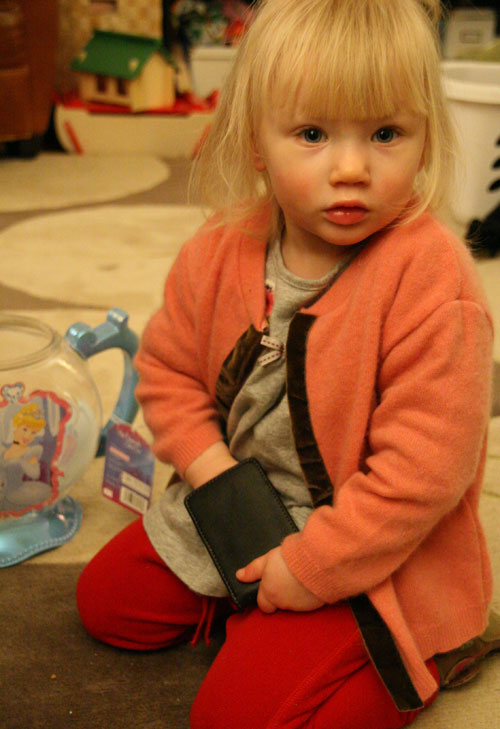
A sweater there:

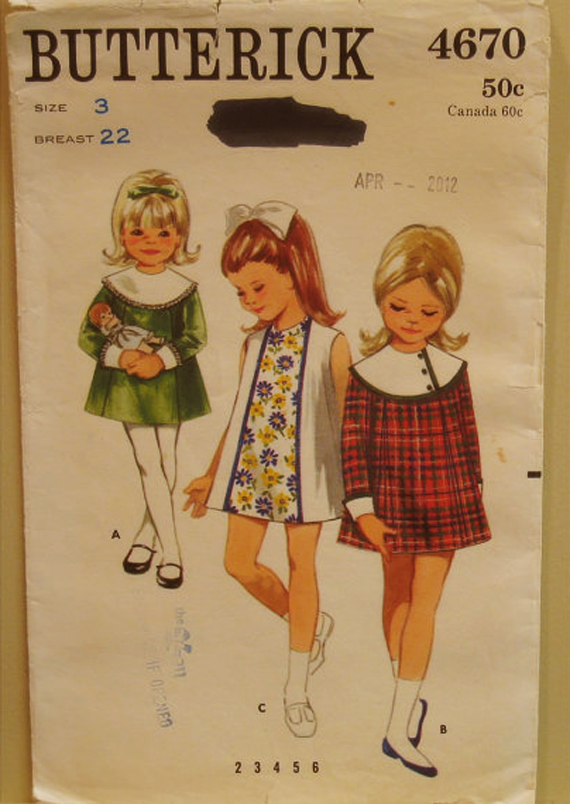
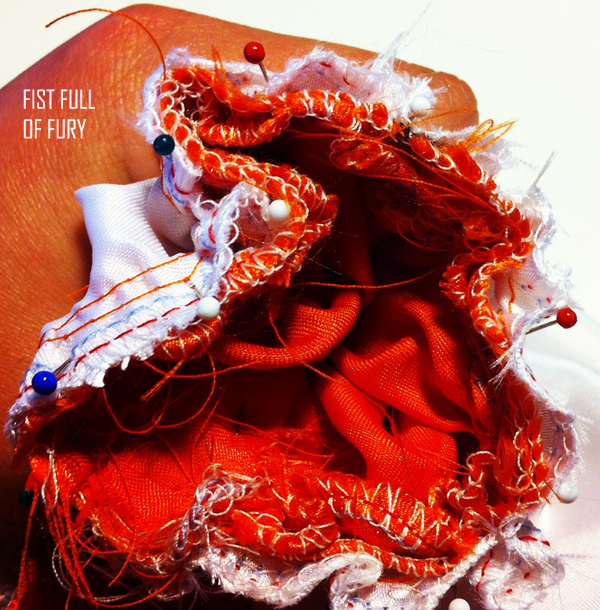
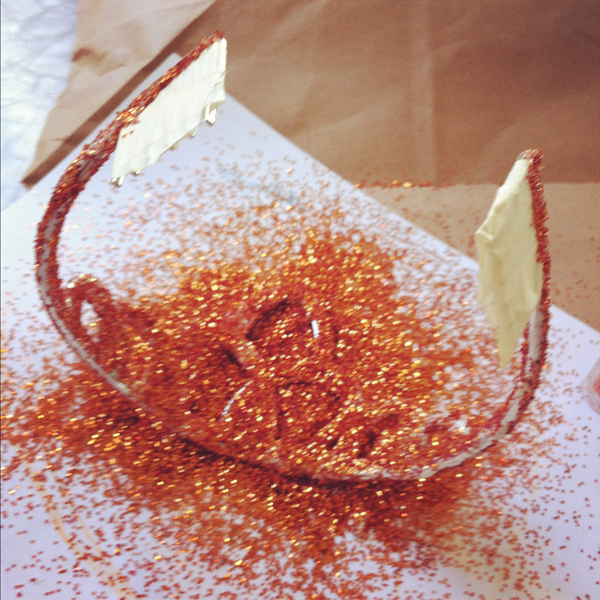
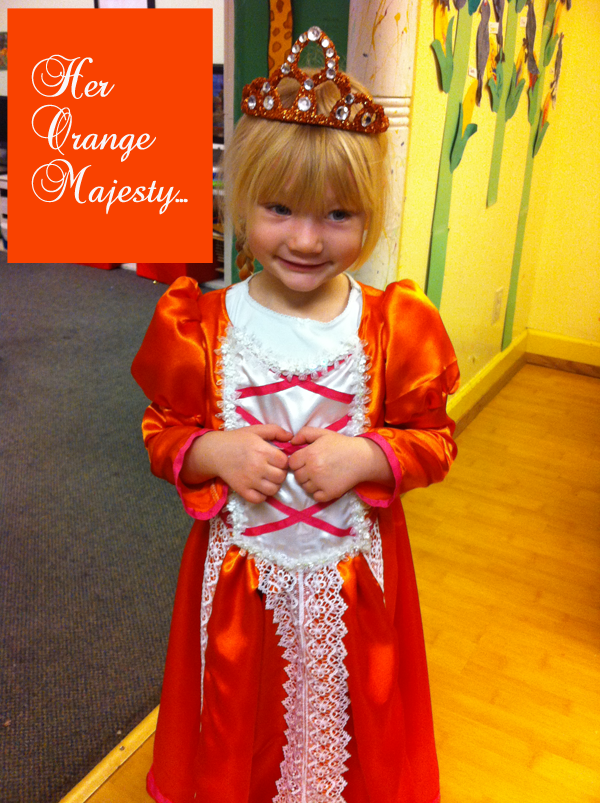
A crazy orange princess dress that nearly drove me to drink:

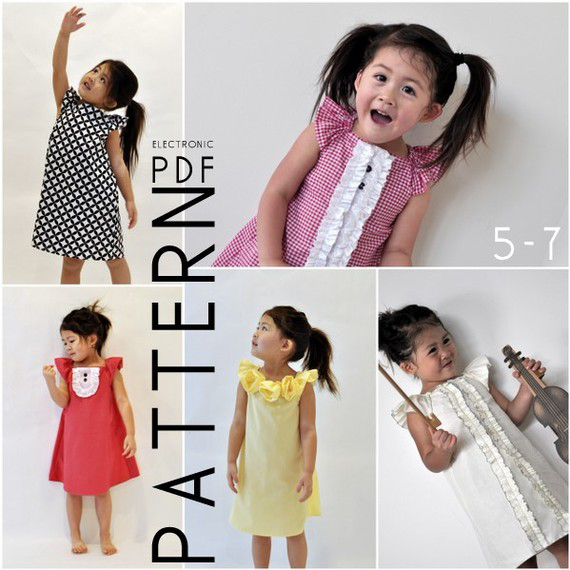
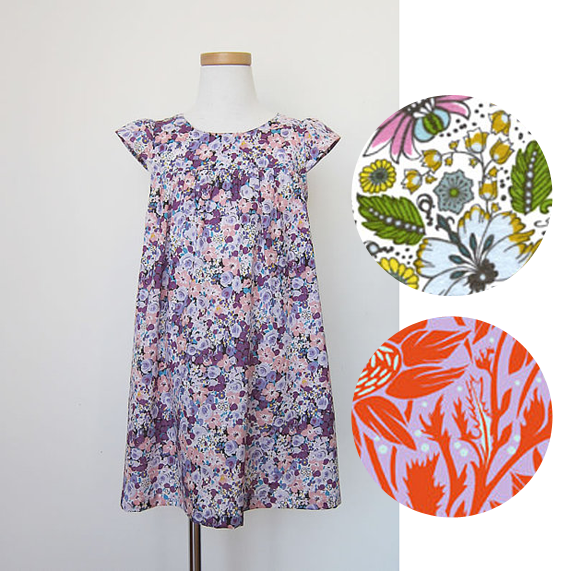
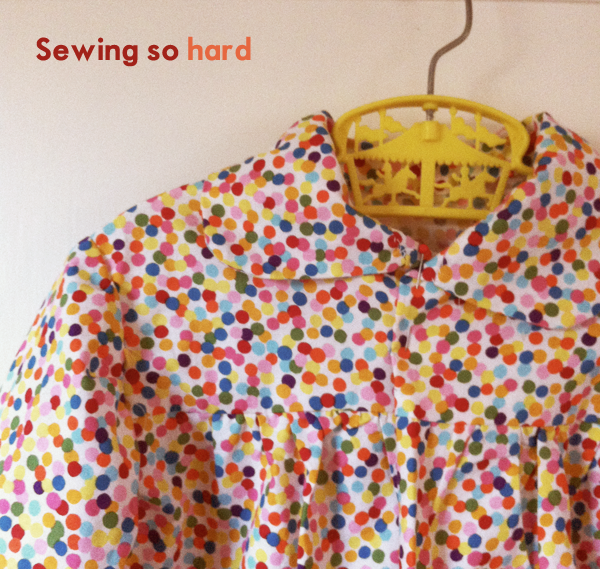
But then I decided to get real and make her this little bit of cuteness:

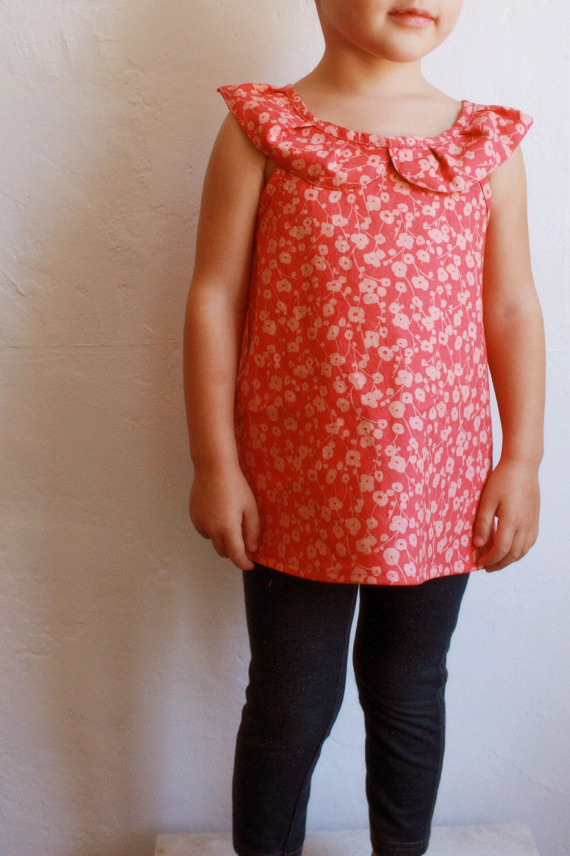
Out of this super cute fabric I bought and the result. THIS!  Gorgeous isn’t it?  I mean, c’mon. I LOVE it so!

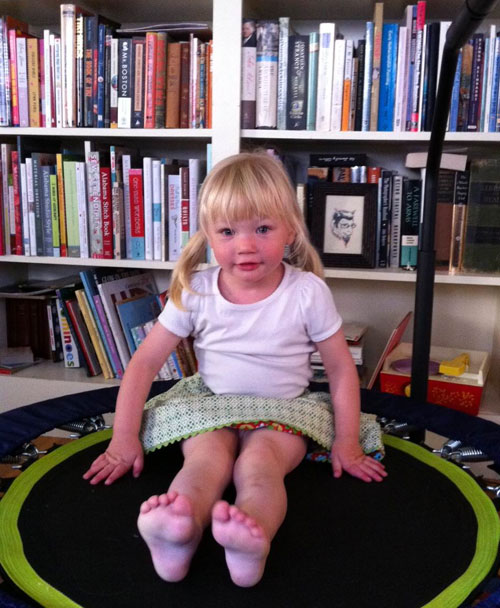
But does she? Nope. Not even close. I got her to approve the fabric and the pattern but actually getting her to wear it? NO DICE.  She started to cry when I asked her to put it on. Like big wet tears and a complete temper tantrum as I tried to cram her into this blasted little smock. Even promises of candy and watching all the Peppa Pig AND Sofia the First AND Olivia for the rest of the night couldn’t make her wear it.

So, I ask you fellow sewers out there—how the heck do you get your kids to wear the clothes you slave over? Seriously? Any tips, tricks, or suggestions?

Help a sewing mama out!


Too busty for that blouse? Try this trick!

There is nothing I love more than a cheery button down shirt dress.  The buttons and placket are a wonderful fashion design element as well as, of course, practical.  Button down shirts have been considered a wardrobe basic for the past 100 years and I don’t see that trend changing anytime soon.  The button down shirt was originally invented for men but quickly became popular with the ladies. Of course, there are  two things *ahem*  that get in the way of making a button down shirt lay flat, looking great on women, if you get my drift…

Friends, I am a busty lady.  I have more curves than Lombard Street and I LOVE a good, flatteringly cut button down shirt.  I also have a complete and utter weakness for shirt dresses. I simply can’t say no to one. However, if I find a shirt that fits over my chest, it is usually too big everywhere else—covering my tinier waist and making me look like a block of cheese. And really, looking like a block of cheese has never been big on any girl’s fashion agenda.

I’ve also found that most shirt dresses/button down shirts look great when you are standing in front of the mirror, but as soon as you sit down, they’ll gap awkwardly. Or sometimes, they’ll just gap awkwardly regardless.

I’ve tried pinning them shut, but that can create its own problems. And I’ve tried those little long pieces of two sided sticky tape, but they pop open and I’m constantly buying more tape, so I’ve come up with this great solution that has made all the difference: SEW IT!

Here’s the way I tackle sewing a button front shirt/dress:

IMPORTANT NOTE! Before you sew it up, make sure you can get out of the shirt/dress without undoing the buttons. This is the most essential step!

1) If you have one, change out the sewing foot of your machine to the narrower zipper foot, it will make sewing around the buttons so much easier, but if you can’t or are too lazy like me, just take great care sewing around the buttons.

2.) Starting from the TOP of the shirt*, place placket buttoned up on sewing machine and hold it tight so, there is no slack. You CAN put pins in to hold the pattern in place.

3.) Very very slowly, start sewing close to the edge of the garment in a straight line, easing by hand the buttons around your sewing foot.

4.) Finish and wear with joy!

*If you are working on a half shirt dress, which buttons only on the blouse part, I would recommend starting from the waist and working your way upward to the collar.

If you are a perfectionist (and I salute you if you are!) I would recommend taking the buttons off, pinning the placket closed and then sewing it up and then sewing the buttons back on.

You can also take your dress/shirt to your local dry cleaner and they’ll do it for $10 or so.

Now you can go out and wear those shirts and dresses you’ve been passing on wearing and actually WEAR THEM!


How to make holly jolly scented bubbles with Method!

The Peach is a big fan of bubbles.  Blowing them and catching them.  It is a great and inexpensive way to have fun with your kiddo. I used to buy whatever bubbles I could find, but one day I watched a bubble pop over the Peach’s head and it sprayed into her eyes. She immediately squinted and started to cry and I had to take her in and wipe her eye with a wet compress. All of a sudden it hit me that I needed to find a better bubbles solution.  Something less… uh.. toxic.

Fortunately, I only needed to look as far as my sink! I realized I could make a batch of safer (and cheaper!) bubbles with Method.

Since it is the season for easy, quick holiday projects, the Peach and I decided that this would be a fun one and a great opportunity to use Method’s holiday scented dish soaps. I really love the sugared mint scent but the frosted fir is pretty fabulous as well!

So, here are the deets.

Pour the following amounts into into the mason jar:

  • 2/3 cup of filtered water
  • 2 tablespoons glycerin*
  • 4 tablespoons of Method dish soap

I have my assistant help me do this—it’s that easy.

Put the cap on the mason jar and shake it for about a minute or so.

Then let the bubbly fun begin! You can also stir the ingredients slowly and let it sit overnight as well if you don’t like the bubbles up top. But we didn’t mind that much!

A quick note about glycerin—I had never used or bought glycerin before, but it makes the bubbles last longer, so it is a great addition and not the freakish product I thought it was. It can be bought at any drug store or even supermarket. I had no idea that glycerin was made from vegetables—I like the gylcerin derived from coconut personally, which I picked up at Whole Foods.  You can also use light corn syrup as well, but that leaves a sticky residue where the bubbles pop.

I made a wand using a pipe cleaner. I made the opening about the size of a quarter and just twisted the ends up. Super easy!

Or you could go big and buy some cool bubble pipes.

In fact, the whole project took less than 5 minutes and the Peach loved helping make it.  She also really enjoyed the immediacy of this handy little project!  And the clean up was quick compared to many other craft projects I have tried with my three year old.

The weather was so nice this weekend that we tried the bubbles out immediately.  We spent a good hour running around blowing and catching bubbles.  Eric even got into the act, blowing bubbles for the Peach to catch.

Oh, and by the way, when a bubble broke and a little bit of the bubble liquid dropped into the Peach’s eye? She laughed!  If that isn’t a sign that Method is a safer product, I don’t know what is!

Thanks Method for inspiring this little holiday DIY!  And you can get these yummy smelling goodies at Target or Method’s Website!

I think this might be my go-to holiday giveaway for kiddos! Have you ever made your own bubbles? Wanna give it a try ?

This post brought to you by 

but all opinions are always our own. To read more on Method’s green practices, ingredients and philosophy, go here!

CRAFTOBER turns into SEW-VEMBER

If that orange princess dress did one thing for me, it was that it made me want to sew even more for the Peach. Easy little dresses that she can wear over turtlenecks and maybe some cozy options instead of long sleeve t-shirts to wear with her jeans and cords. I think this is going to be a great way for me to continue to flew my sewing muscles.

But first to find the right patterns to use. I decided I wanted to use on pattern from Etsy because I think they have some amazing patterns available for children’s clothing. Most of their patterns come with incredibly detailed instructions, which I realize I need to create a great finished product.

Here are some I looked at:

I really like this sweet little peasant dress pattern. Looks easy and seeing the plaid version (on such a cute little model) made me kinda excited about doing one out of flannel…  From Etsy seller, Dream Spun Kids.

The Charissa dress would look really cute over a white turtleneck.  And I could add a lot of cuteness like a peter pan collar or a placket of ricrac to give it a bit more punch! From Etsy seller, Growing Up With Charissa.

I’m really in love with this darling little blouse that has a faux peter pan style collar/sleeve. Perhaps if I lengthen it, I could turn it into a dress. But I wonder if this would be better for summer. Thoughts? From Etsy seller Too Sweets, who has some of the sweetest little dress patterns around! Actually, I think I’m going to save this dress for summer of 2013.

But I think I’m going to go with this pattern, the Fuwafuwa dress from Dans La Lune. Super simple and when matched with a simple little peter pan collar blouse from Old Navy or a turtleneck and some fun tights or leggings, it will totally be a party of cuteness. And I think I’ll use these flannel fabrics I just purchased from Alewives Fabrics, which I think has the nicest selection of flannels around–no too cutesy/baby or holiday themed.

Now for the vintage pattern, I’d like something simple. As I’ve heard vintage patterns leave a lot of little steps out, which is kinda a bummer to say the least. And since I am easily traumatized by scary sewing steps, I want to keep this as simple as possible.

But simple doesn’t mean it can’t be super cute!

Check out this darling pattern. I think the collar is a bit much, but that middle one is MONEY! From Etsy seller, Vogue Vixen.

This dress is so short, it could really be used as a little tunic and worn with jeans.  From Etsy seller, Kallie Designs.

I will take all three versions of this dress!  And the little blue purse, please! Pity it is a size 10. Hmmm… Maybe I should get it for later… From Etsy seller, Fresh and swanky.

But I did go and buy this pattern. It has long sleeves and a Peter Pan collar and pockets, which I know the Peach will enjoy immensely!  Made out of more snuggly flannel from Alewives and paired with her cords or jeans,  I think it will be a suitable addition to her wardrobe.

Hmm… That dark blue fabric looks a bit blah for a kiddo. I picked it because it was like a shirt that her Daddy wears, but it does seem rather dreary for a peppy little girl of three, don’t you think. Maybe I’ll do it in this color instead…

My goal is to make two of each of these dress/shirts I’ve decided to try to make two and two of the fuwafuwa dress this month. Wish me luck!

Do you do any sewing for your kids?  Have you in the past? What patterns do you use? How long does it take you to “knock out” an item?


CRAFTOBER:: My Peachy Princess!

What a fun crafty month, it has been!  I’ve certainly been spending more time this month than in the past year glue-gunning, modge-podging and sewing my little heart out. And all for a specific little project. A certain little someone’s innocent Halloween costume request.

“Mama, I am going to be an orange princess for Halloween!” the Peach declared one day.

Hmmm… Not pink (which would have been easy..to buy, that is) but orange. Her favorite color. Hoo boy.

OK.

I first ran to Beverly’s the closest craft/fabric store I could get to and lo and behold orange satiny fabric was on sale–$4.00 a yard. HUZZAH! I snatch up four yards and some other stuff along with this pattern.  It has easy on the the pattern envelope and I’ve owned a sewing machine for thirty years. how hard could it be?

It turns out pretty hard.  Like stab a seam ripper in my eye hard at times.

Well, not necessarily hard, but time consuming, filled with little steps and the fabric was a total nightmare. Hard to press, and if you look at it wrong, it will freak out on you.

But once I got into sewing it, I began to slowly fall back in love with sewing.  And I let my craft flag fly! I even turned a bachelorette crown topped with wee gentlemen parts into a sassy orange glittery rhinestone.

So, how did the final dress turn out?  Well, someone really likes it! And that is the most important thing. I tried to sparkle it up with more lace and lacing. And wee bit of pink.  The Peach gasped with happiness when she saw herself in the mirror. Twelve hours and $50 worth of fabric and ribbon and netting netted the happiest little orange princess around.

Just don’t look too close at the hem. That’s all I ask…

How was your crafty month? What are you working on right now?