Category Archives: Dottie’s Kraft Korner

Too busty for that blouse? Try this trick!

There is nothing I love more than a cheery button down shirt dress.  The buttons and placket are a wonderful fashion design element as well as, of course, practical.  Button down shirts have been considered a wardrobe basic for the past 100 years and I don’t see that trend changing anytime soon.  The button down shirt was originally invented for men but quickly became popular with the ladies. Of course, there are  two things *ahem*  that get in the way of making a button down shirt lay flat, looking great on women, if you get my drift…

Friends, I am a busty lady.  I have more curves than Lombard Street and I LOVE a good, flatteringly cut button down shirt.  I also have a complete and utter weakness for shirt dresses. I simply can’t say no to one. However, if I find a shirt that fits over my chest, it is usually too big everywhere else—covering my tinier waist and making me look like a block of cheese. And really, looking like a block of cheese has never been big on any girl’s fashion agenda.

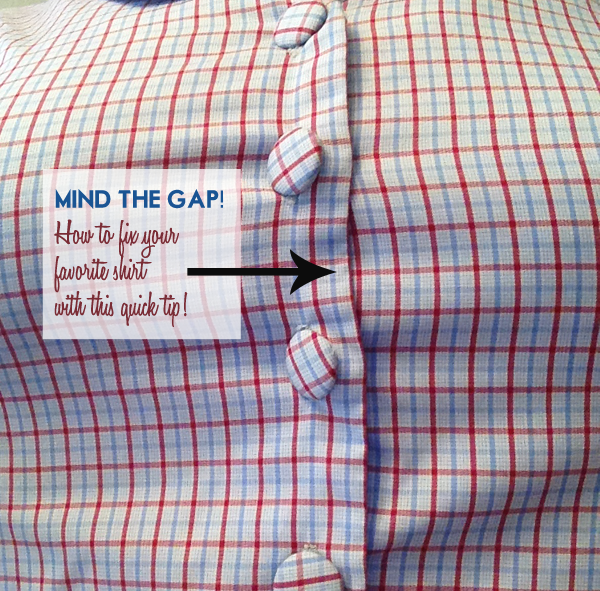
I’ve also found that most shirt dresses/button down shirts look great when you are standing in front of the mirror, but as soon as you sit down, they’ll gap awkwardly. Or sometimes, they’ll just gap awkwardly regardless.

I’ve tried pinning them shut, but that can create its own problems. And I’ve tried those little long pieces of two sided sticky tape, but they pop open and I’m constantly buying more tape, so I’ve come up with this great solution that has made all the difference: SEW IT!

Here’s the way I tackle sewing a button front shirt/dress:

IMPORTANT NOTE! Before you sew it up, make sure you can get out of the shirt/dress without undoing the buttons. This is the most essential step!

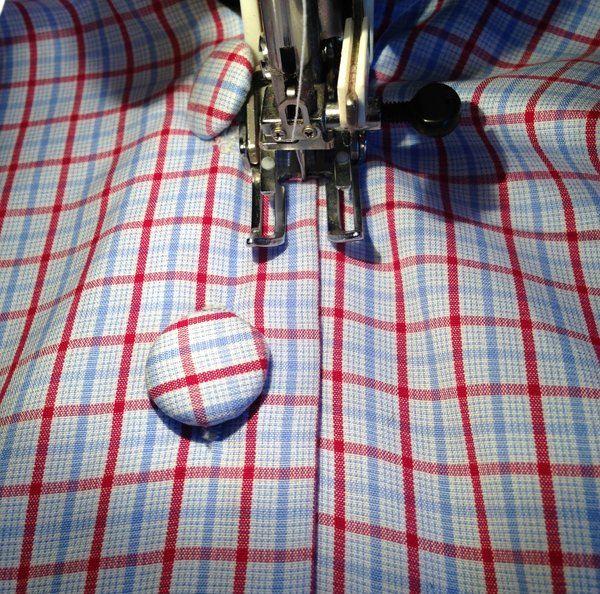
1) If you have one, change out the sewing foot of your machine to the narrower zipper foot, it will make sewing around the buttons so much easier, but if you can’t or are too lazy like me, just take great care sewing around the buttons.

2.) Starting from the TOP of the shirt*, place placket buttoned up on sewing machine and hold it tight so, there is no slack. You CAN put pins in to hold the pattern in place.

3.) Very very slowly, start sewing close to the edge of the garment in a straight line, easing by hand the buttons around your sewing foot.

4.) Finish and wear with joy!

*If you are working on a half shirt dress, which buttons only on the blouse part, I would recommend starting from the waist and working your way upward to the collar.

If you are a perfectionist (and I salute you if you are!) I would recommend taking the buttons off, pinning the placket closed and then sewing it up and then sewing the buttons back on.

You can also take your dress/shirt to your local dry cleaner and they’ll do it for $10 or so.

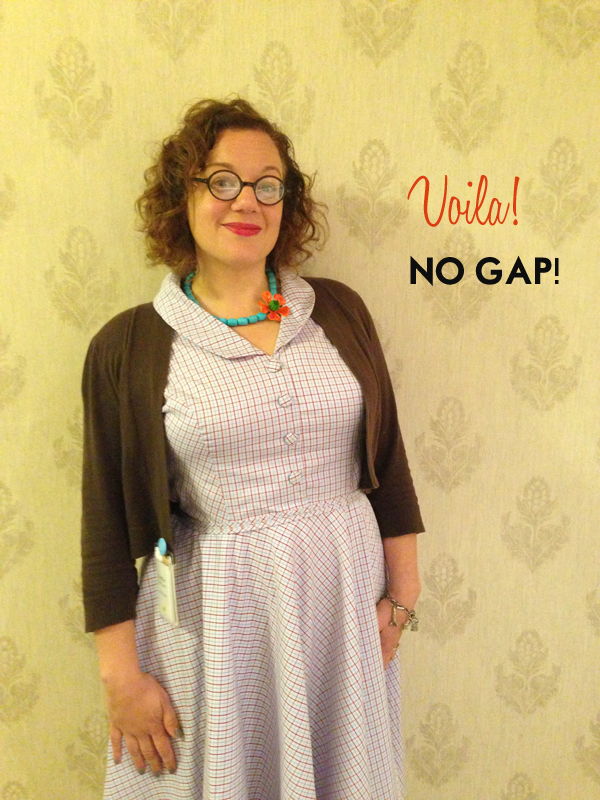
Now you can go out and wear those shirts and dresses you’ve been passing on wearing and actually WEAR THEM!


Amazing Umbrella Fix Tutorial!

Have you ever gone to an estate sale and come across some old tatty vintage umbrellas? Such beautiful prints, but alas the fabric is ripped? Well, I do. A lot.

Last year, I saw this beautiful umbrella in the garbage at an estate sale and plucked it out for free. Who doesn’t love a cheery yellow umbrella on a gloomy rainy day? But the side rip was a real downer.

Until I decided to fix it! Fifteen minutes later and I was walking on sunshine with my dandy new umbrella.

Let me show you how:

Easy peasy, right?

So, next time you see one of those charming busted brollies in the trash at the estate sale, grab it!

Happy crafting, friends!


Dottie’s Kraft Korner :: Attack of the UFO Update.

Friends, today’s UFO is a old one. Like two years old.  It was in my vintage seventies prep phase when I HAD to have a Bargello needlepointed pillow for my sofa.  Two to match my Denyse Schmidt quilt that I love so much that I couldn’t leave it in the bedroom, but needed it in the living room on the sofa. I know. I’m weird that way.

Anyhoo. I was on my maternity leave and knew that crafting and my sleep deprived lifestyle might not lead to the most charming finished pieces. I needed an easy craft that I could do while zoning out watching TV. Bargello needlpoint seemed like the perfect solution.

And it was. And two years later I finally finished my pillow fronts. But after you spend two years on a project, you really don’t want to screw it up. Friends, there is a time and place to call in the professionals and this was one of them.

I took my two lovely finished pieces to Needle in a Haystack, a mammoth store dedicated to all things embroidery.  People it’s seriously HUGE. People travel from miles to go to the Embroidery mecca for good reason.  They know everything there. And most importantly they have nice people who can turn my pieces into pretty pillows. So, I handed my baby twins over to these kind people along with a hefty check and waited six weeks for the call.

And the call came. My pillows were ready for me to pick up. I nearly wept when I saw the final pillows. Oh. So. Pretty.

Oh, I’m so happy with the results! It’s amazing to see something you worked on for two years finally be done.

I am so enamored with this technique of having someone else finish the project that I think I’m going to try that with a couple of quilt tops! Whoohoo!

Stay tuned for more adventures in UFO attacks!


Dottie’s Kraft Korner :: The Peach’s Upcycled Sweater.

I used to be a knitter. A hard core uber knitter who would drool over yarn and patterns and spend hours knitting dear sweaters for friends’ babies. But right around when I had my own little baby, my RSI kicked in hard core and ended my once fruitful knitting career.

So, I’ve been supplementing her knitted wardrobe with vintage sweaters I buy from Etsy or Ebay. And a few very dear friends even gave me the sweaters I knit for their children for the Peach. But I still have the desire to have my little cutie wear something cozy made my me.  Each time I read Knitty Kitty nearly sends me into a knitting frenzy and a goal to make a sweater for my Peach. But why not spare my arms so grief and try upcycling an old sweater into a new one for the Peach thanks to some Etsy inspiration?

A year ago at an estate sale I bought a lovely plain JCrew cashmere sweater (size small) that was what I like to call the perfect pink–somewhere between ballet pink and champagne pink and oh so cozy and soft and yummy.  That beloved color looks like death on me, but grand on the Peach, so I thought it would perfect for my upcycling sweater project.

With the help of a friend, I cut apart the sweater and used this pattern from New Conceptions and four hours later had a lovely little pink sweater tipped with brown velvet for the Peach.

I must admit I relied a lot more on my friend’s confident sewing than my own–the sweater fabric was very stretchy and I was such a nervous nelly about cutting and making mistakes when really–there was no need.  It’s just a sweater! It cost me $2.50!  That is less than what I spend on white muslin.  I’ve always said the best thing for sewing is a fearless attitude.

And I’m very happy with the final result.

And the Peach loves it.

“Cozy” she said, which is kinda her word for when she is very happy with the way something makes her feel. I couldn’t agree more, little girl.

Oh and that Cinderella plastic thing off to the side was a “gift” from the X ray technician that Miss Peach met yesterday for her yearly dye test review for her recurring UTI, which involves a catheter and some serious grief for the Peach.  The X ray technician had cancer of the eye as a little boy and was so struck by his own experiences under X ray machines that he decided to make it his career on helping little kids get through their X rays.  What a great guy! And the Peach loves it, of course!

Have you ever upcycled sweaters? What was your experience?

Dottie’s Kraft Korner: Valentine’s Day Craftiness

What the? Valentine’s Day is only four days away?  How did that happen?

Well, never fear friends, I’ve found the most charming Valentine Day crafts for you that will only take a few minutes to do and give a whole lot of craft Valentine’s Day bang for little craft buck.

Personally, I’m crushing on these adorable cupid arrow gift bags from Creature Comforts.  So sweet! How could a lollipop stick, some paper, and a paper bag be that adorable?

When in doubt, Martha it out.  Because you know Martha will have something beautiful and clever and in this case easy with these heart-shaped button covers that would put a smile on any little person’s face come February 14th.

Remember those great valentine’s day “post boxes” you made as a kid to receive all of your valentines. Well, check out this Valentine Day felt envelope tutorial that totally beats the old paper bags! Oh, the cuteness of it all. And totally doable for the eight and up set, I believe! From Barks Blog.

Now, ya’ll are familiar with Marie from Make & Takes, right? That woman is a craft genius.  A total triple threat of awesomeness because not only is she creating clever crafts her kids, but she is also THE NICEST GIRL IN THE UNIVERSE. Seriously! And she created this adorable valentine hear lei, which is just killing me with cuteness. And this is great for the three and up set, which makes it even more awesome.

Now, this last one is just too lovely for words.  This is a great example of how hearts could end up in my daily decor. If they were made of lace and looked as pretty as these from Michele Made Me.  What a lovely idea–lace heart banner. Lovely.

OK, we gave you the ideas, now fifteen minutes in Michaels and you’ll be set for a fun crafty heart filled weekend.

Enjoy!